Mark an assessment in SpeedGrader
Work through the submissions queue: marks, a comment bank, inline comments on the learner's text, a rubric that sums itself, and keyboard shortcuts to keep moving.
Flow
The assessment loop
Diagram: The assessment loop. Steps:
- Learner submits
- Submissions queue
- SpeedGrader: mark + feedback
- AI Grading draft → review
- Moderation (optional)
- Gradebook: Post grades
- Learner sees mark + feedback
- Grade history + activity log
Connections:
- Learner submits → Submissions queue
- Submissions queue → SpeedGrader: mark + feedback
- Submissions queue → AI Grading draft → review
- SpeedGrader: mark + feedback → Moderation (optional)
- AI Grading draft → review → Moderation (optional)
- Moderation (optional) → Gradebook: Post grades
- Gradebook: Post grades → Learner sees mark + feedback
- Gradebook: Post grades → Grade history + activity log
Learner actionPallara does thisStaff action
A saved mark is invisible to the learner until it is posted — that gap is where moderation lives.
Walkthrough · 5 steps
From queue to posted grade
Select a step to see the screen for it.
- 1Teaching → Submissions: filter to Unmarked, find the row, select Open.
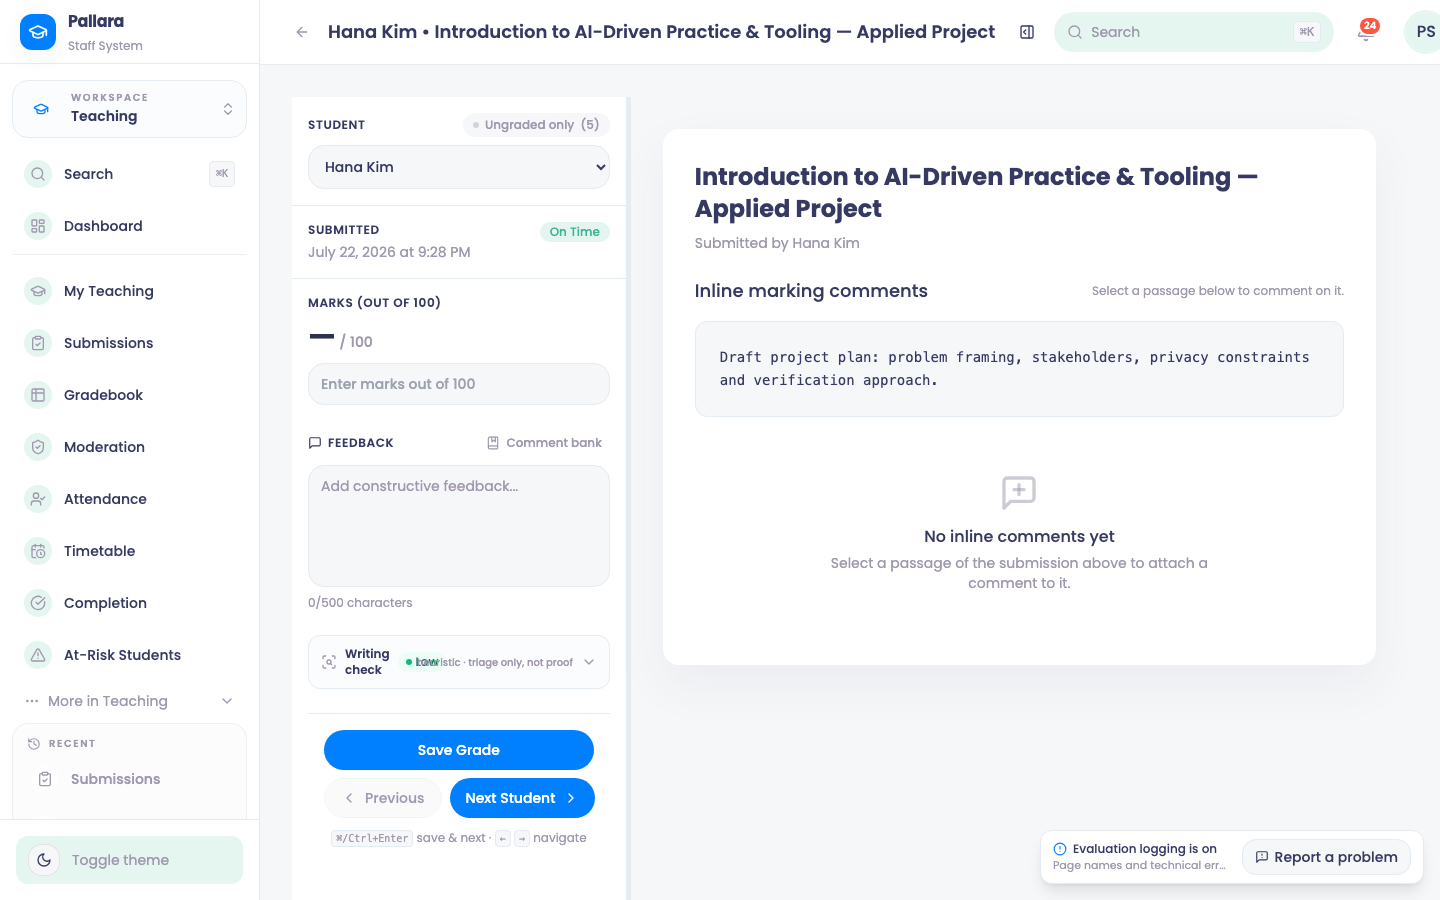
- 2SpeedGrader: learner selector, submission time, marks, feedback, comment bank, writing check; the submission with inline comments on the right. ⌘/Ctrl+Enter saves and moves on.
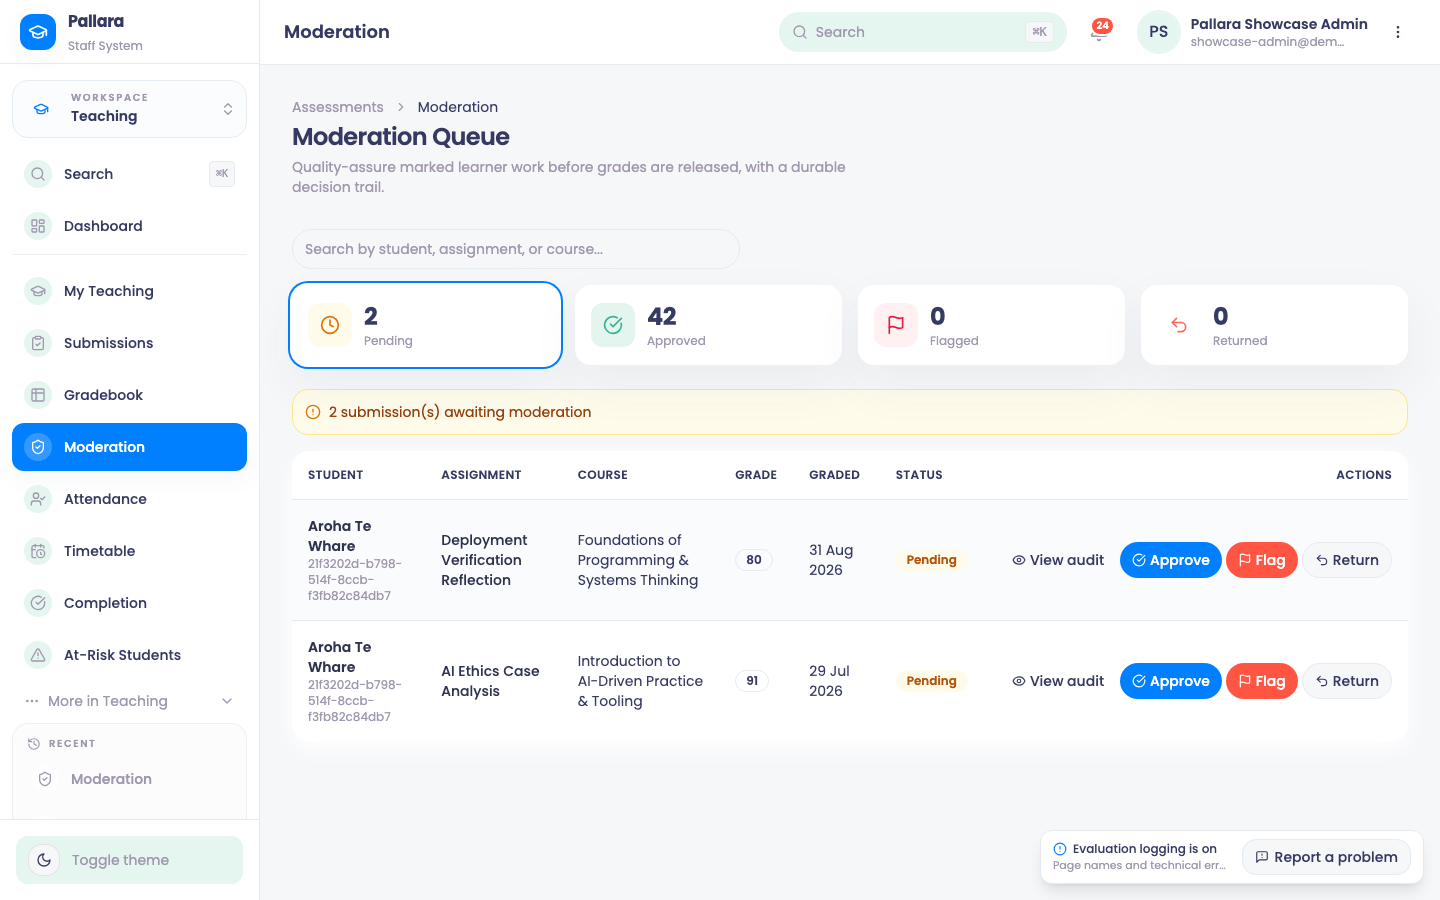
- 3Teaching → Moderation if your provider moderates: approve, flag or return with a note.
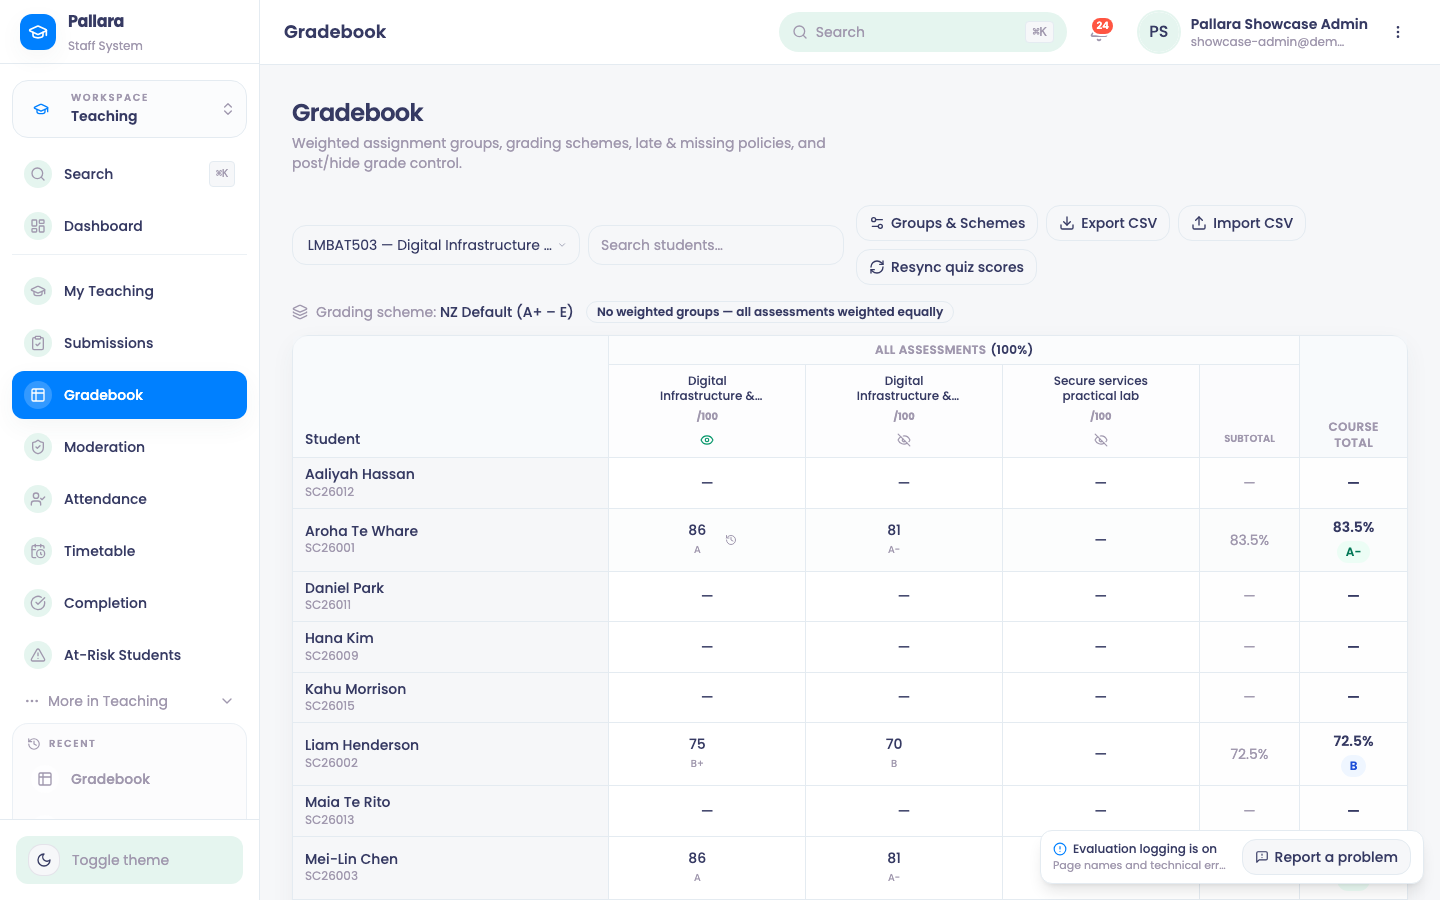
- 4Teaching → Gradebook: Post grades to students on the assessment column.
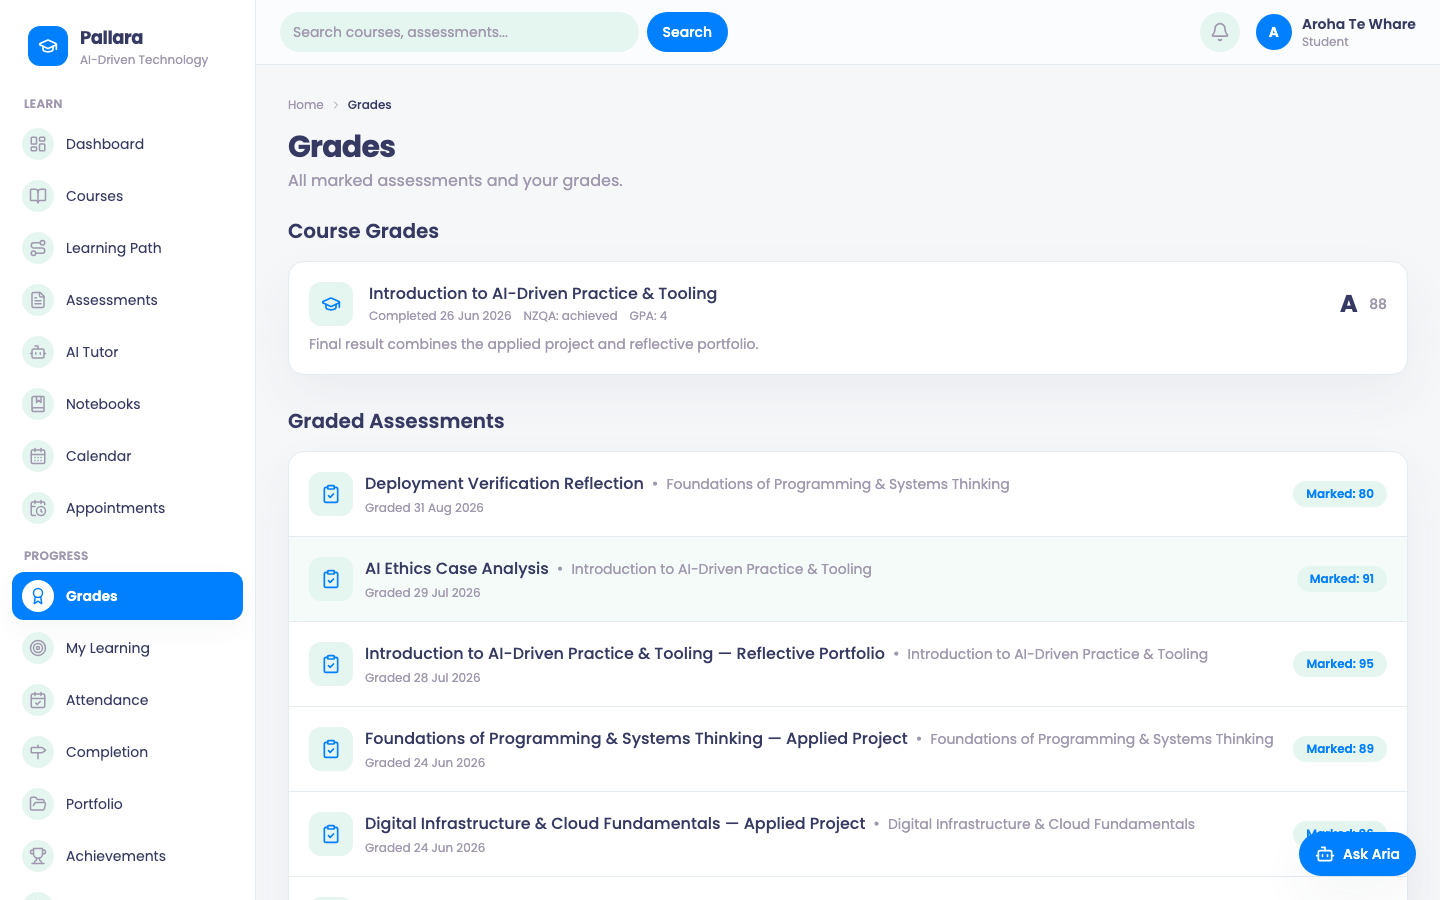
- 5The learner's Grades page shows the mark and your feedback.
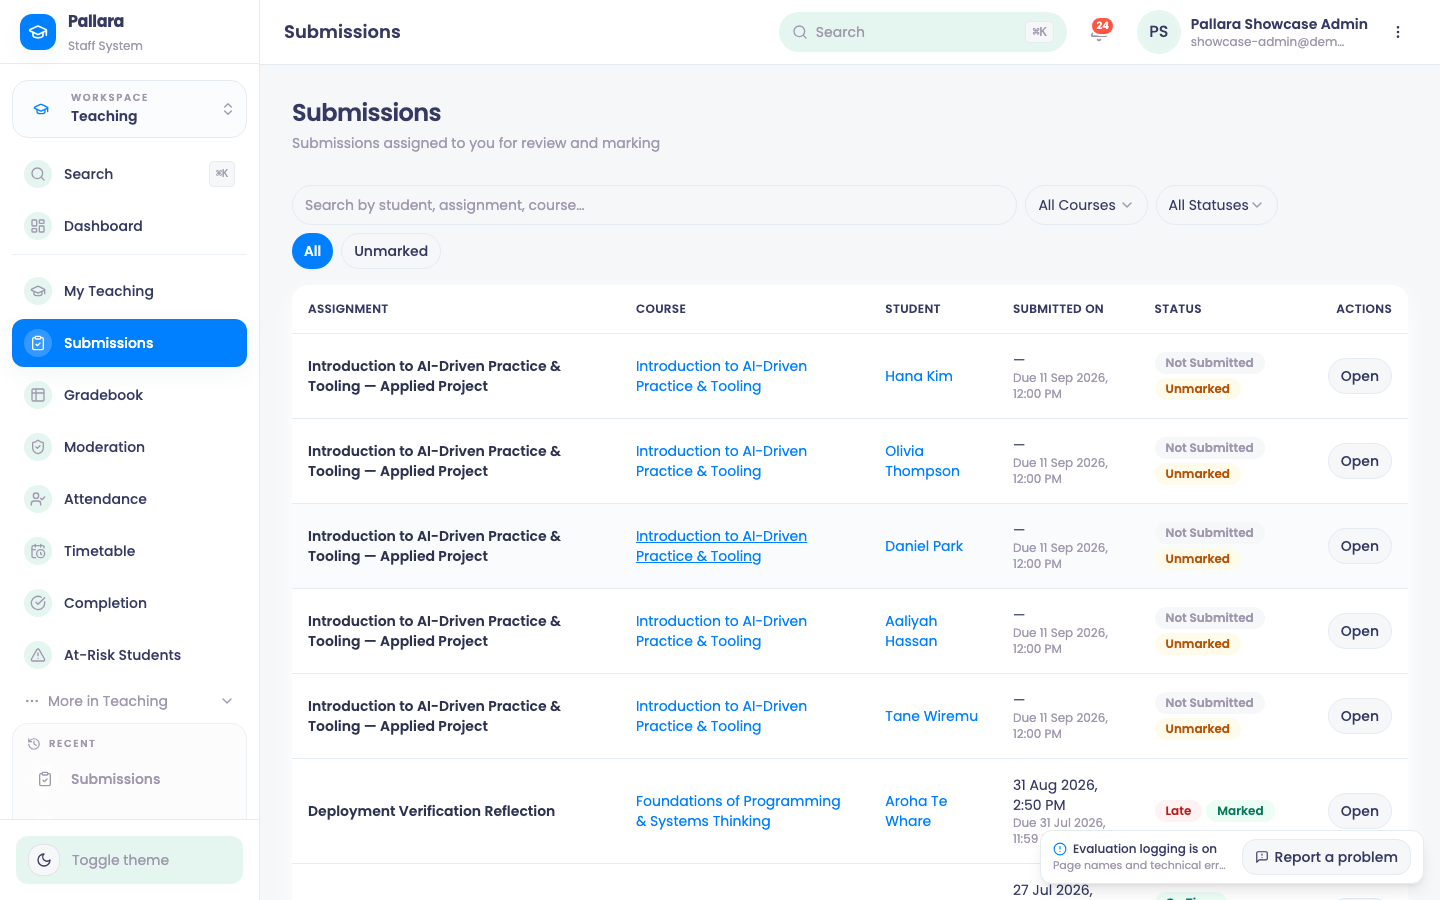
The Submissions queue.
SpeedGrader.
Moderation.
The Gradebook.
What the learner sees.
1 / 5
Open the queue
- Open Teaching → Submissions. The queue lists every submission with its learner, assessment, course and status.
- Select Unmarked to narrow the queue, then search by learner, assessment or course if it is busy. Check the row's learner, course and any Late badge before you open it.
- Select Open. SpeedGrader opens on that submission.
Mark
- The Student selector at the top left steps through the cohort; Ungraded only narrows it to what is left and shows the count. Under it, the submission time and an On Time or Late badge.
- Read the submission on the right. To comment on a specific passage, select the text — the comment attaches to that passage under Inline marking comments, and the learner sees it in place.
- If the assessment has a rubric, choose a level on each criterion; the total is calculated for you. Otherwise enter the mark in Marks (out of 100).
- Write learner-facing feedback in Feedback, or open the Comment bank and insert a saved comment, then personalise it. Marker Notes are private to staff.
- Writing check gives a quick heuristic read on the writing — a low, medium or high flag for triage only, not proof of anything. Use it to decide what to look at more closely, never as a verdict.
- Select Save Grade, or press ⌘/Ctrl+Enter to save and move to the next learner. ← and → move between learners without saving.
NoteSaving a mark does not show it to the learner. Grades are released from the Gradebook — see Release grades from the Gradebook. This lets a marker finish a whole cohort before anyone sees a result, and lets moderation happen in between.
TipIf the assessment has a rubric and a text submission, AI Grading can draft the marks and feedback for you to review first — see Review an AI grading draft.
Was this guide helpful?