Create a programme and its intakes
Set up a programme, fill in its NZQA details, and add the intakes learners will enrol into.
Programme → structure → courses → learners
Diagram: Programme → structure → courses → learners. Steps:
- Create programme
- Add intakes
- Programme Builder: terms and courses
- Build each course in Content Builder
- Learners enrol; core courses assigned
Connections:
- Create programme → Add intakes
- Add intakes → Programme Builder: terms and courses
- Programme Builder: terms and courses → Build each course in Content Builder
- Build each course in Content Builder → Learners enrol; core courses assigned
Programmes, the Builder and a course
Select a step to see the screen for it.
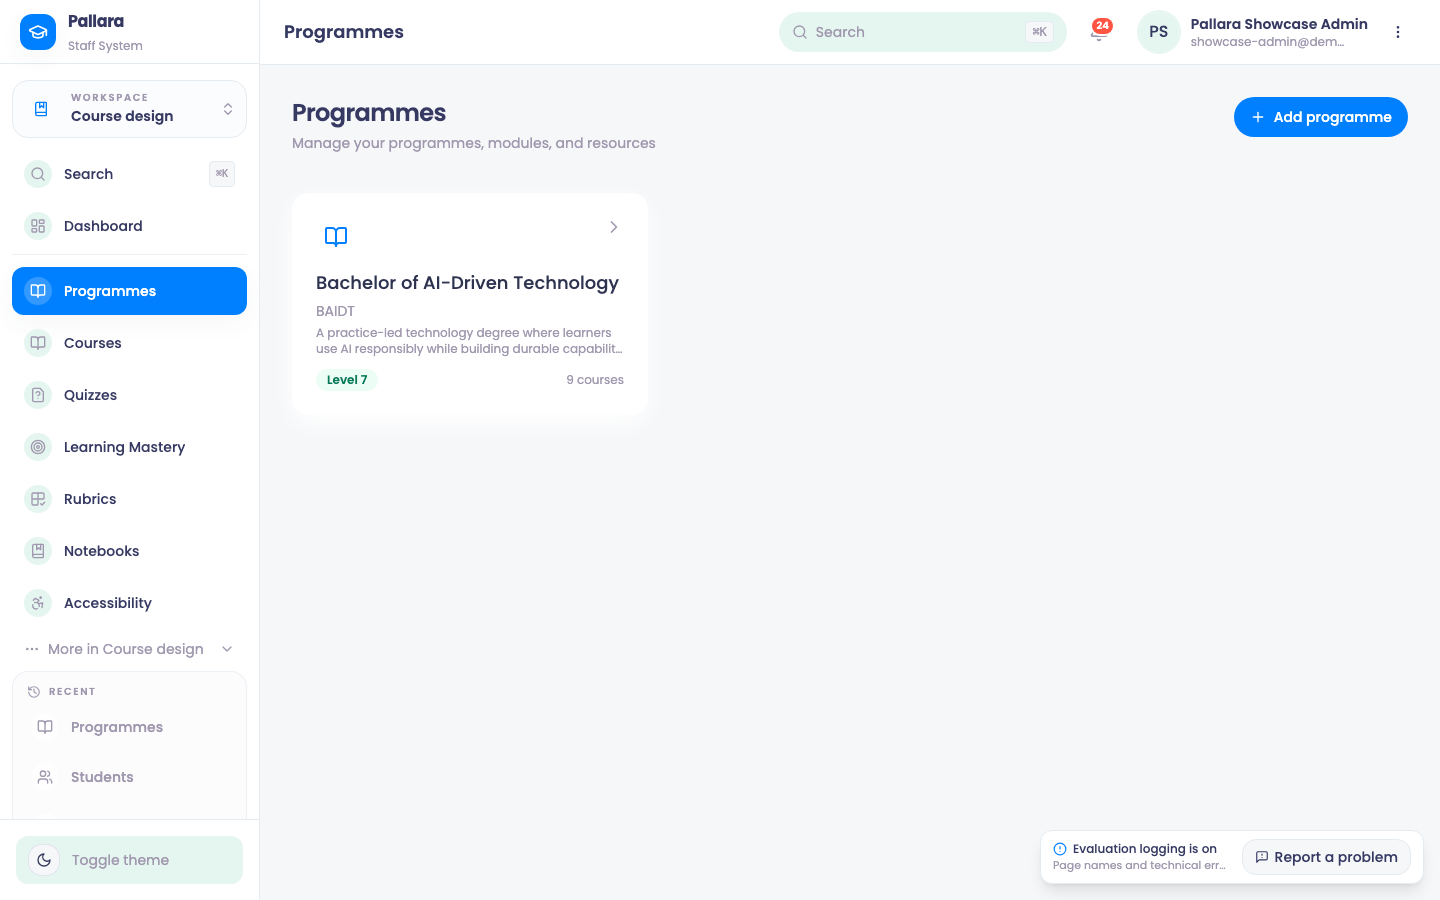
- 1Course design → Programmes: one card per programme with its level and course count.
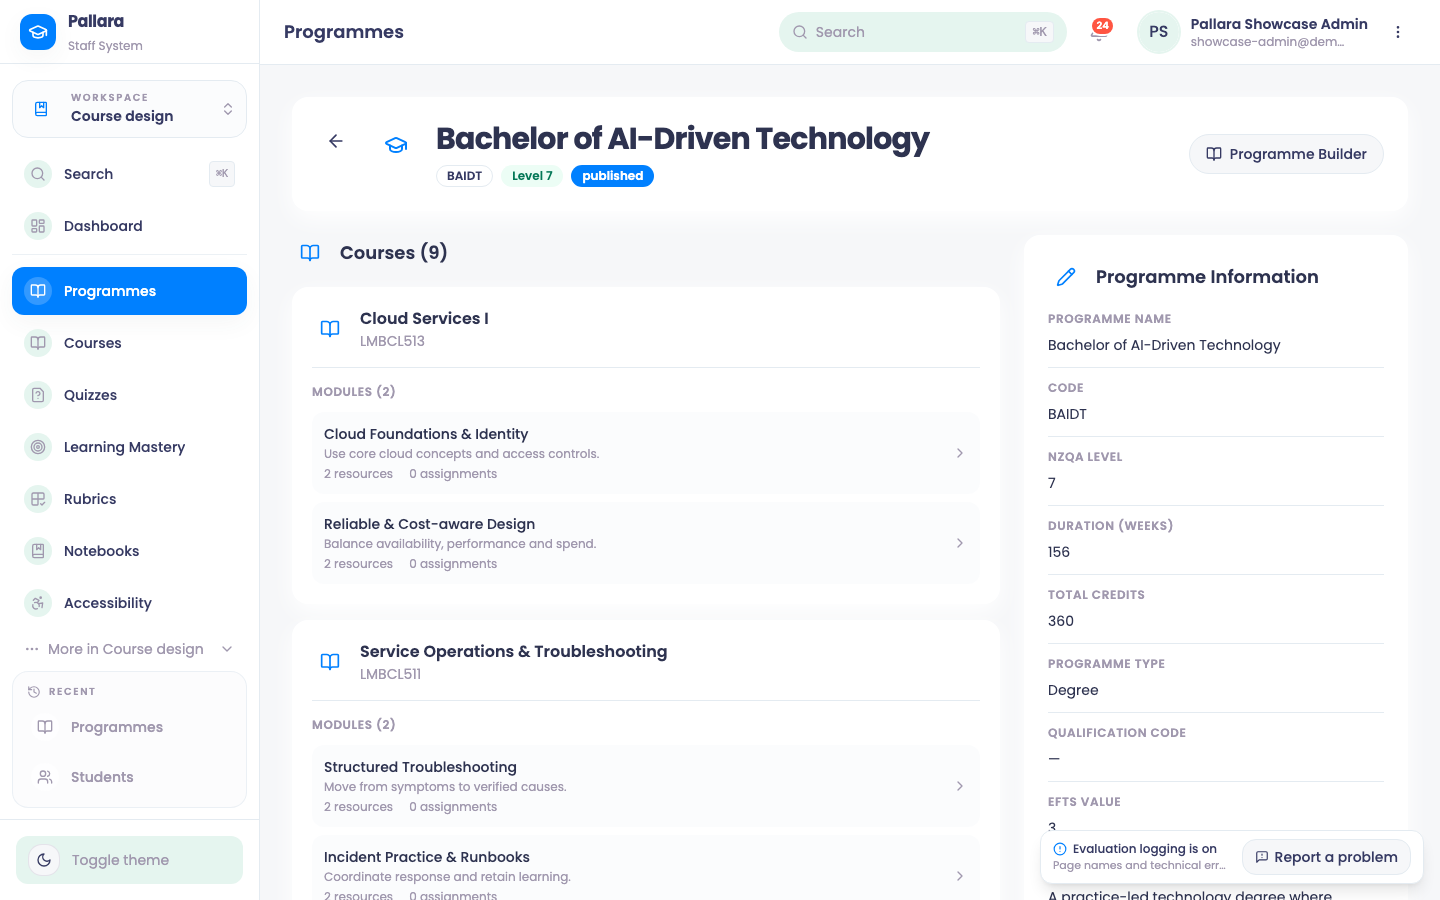
- 2A programme's page: code, level, status, Programme Builder, and every course with its modules.
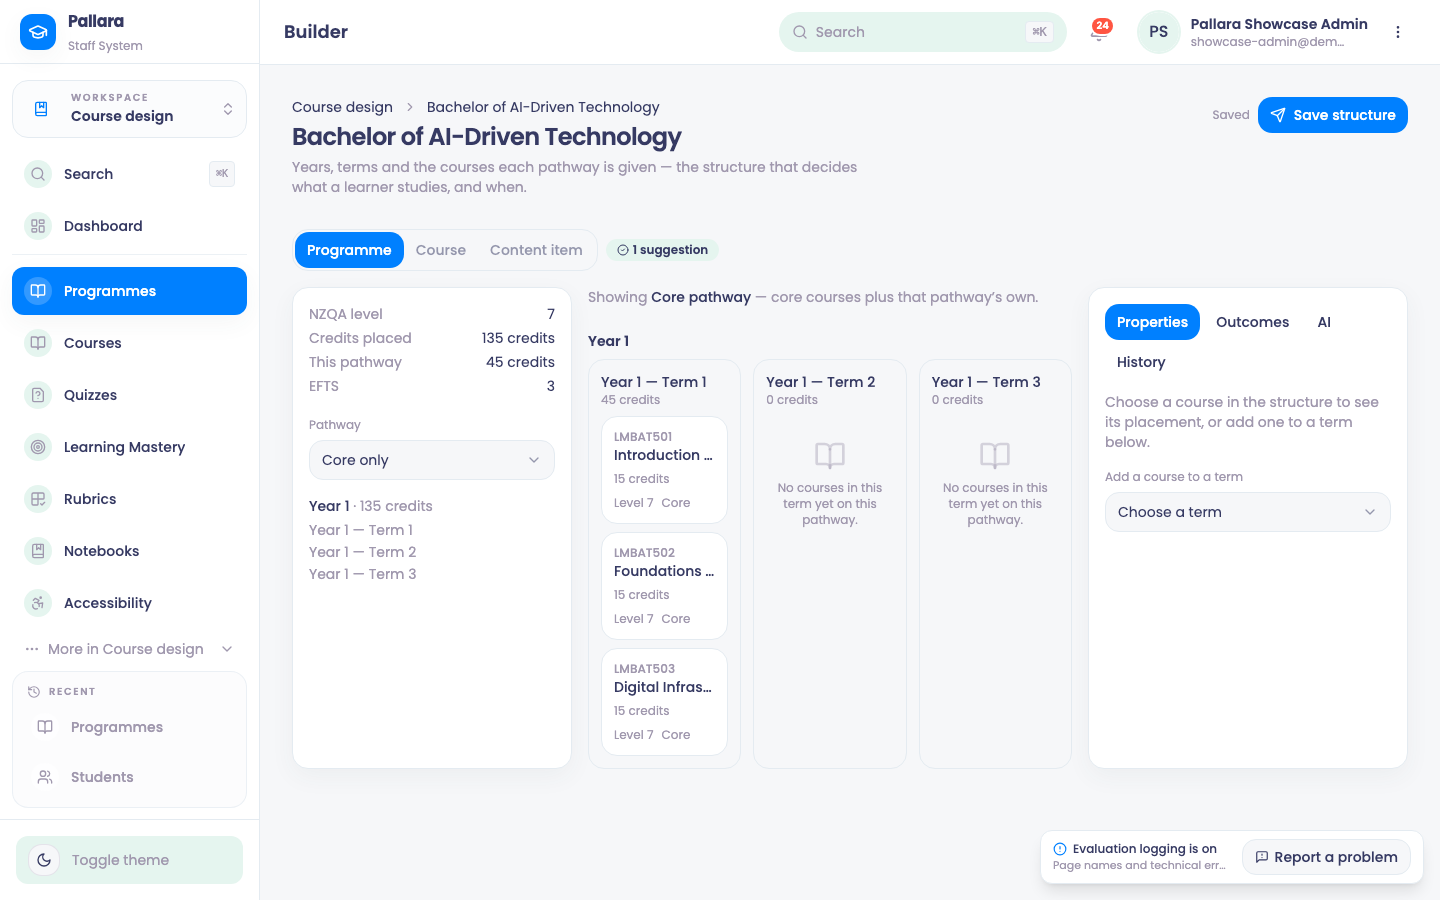
- 3The Builder: summary strip, Year 1's terms with placed courses, and the Properties / Outcomes / AI / History panel.
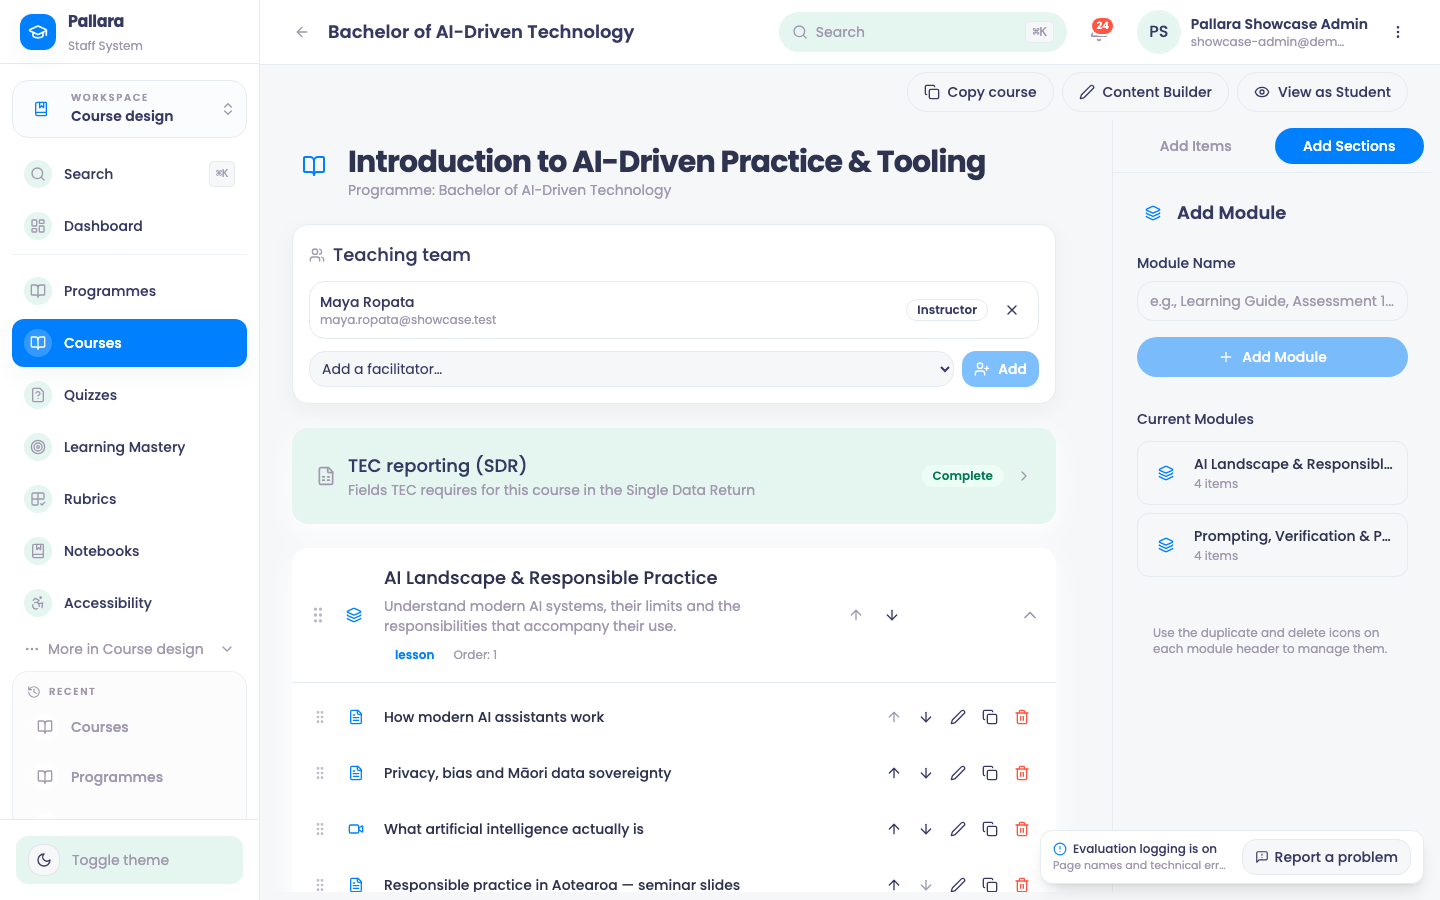
- 4A course: teaching team, the TEC reporting (SDR) card, modules and items, and Content Builder in the header.
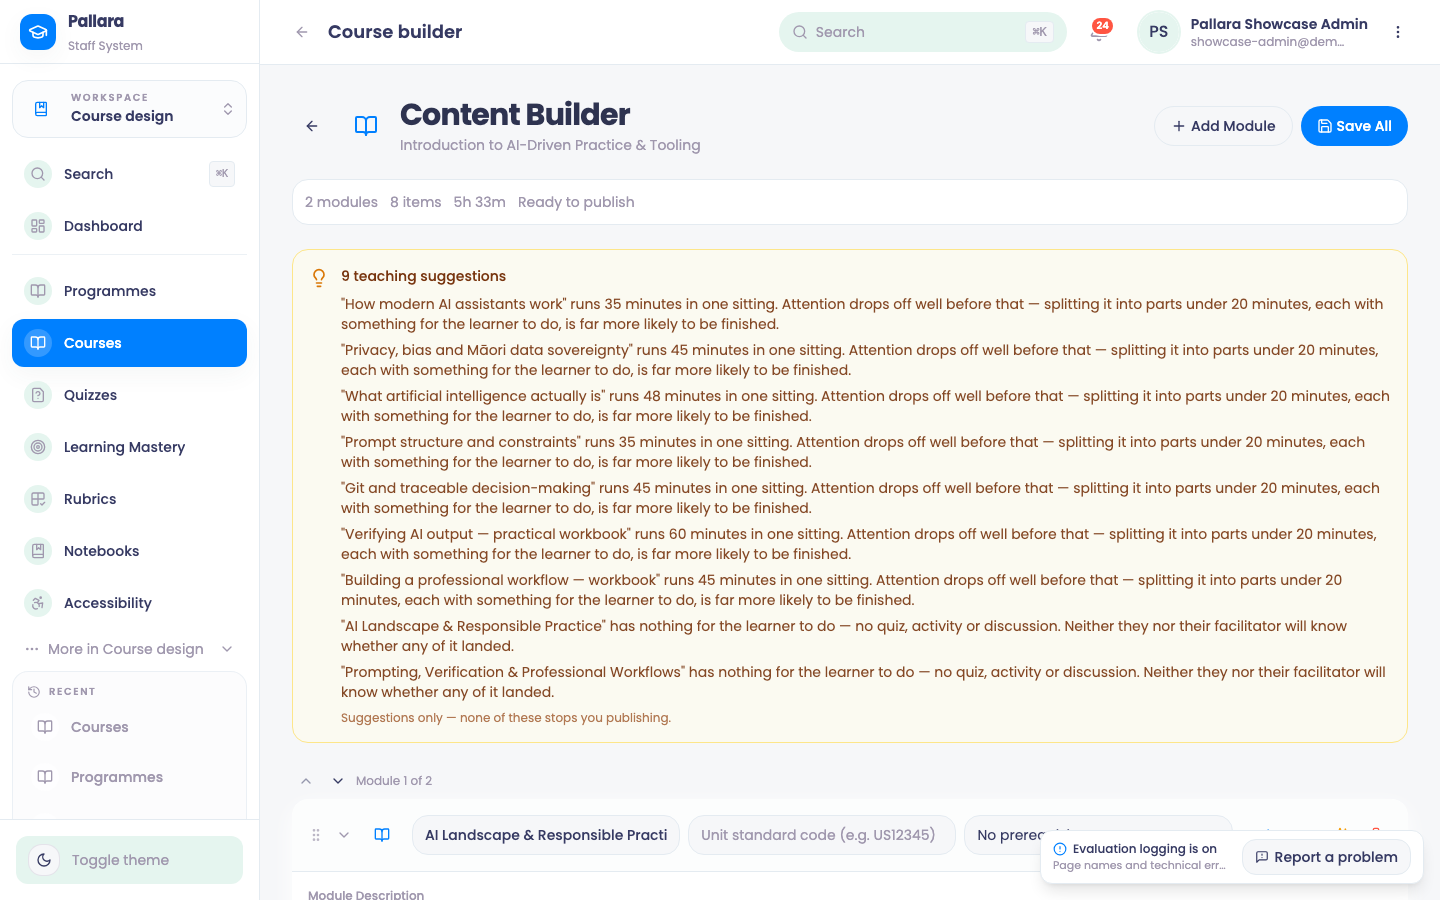
- 5Content Builder: modules, items, learner time, Ready to publish, and the teaching suggestions.
Create the programme
- Open Course design → Programmes, then select Add programme.
- Enter a unique Programme name. The dialog opens with Active selected; keep it to make the programme available. (An active programme displays as Published on its card and detail page.)
- Select Create. Expect Programme created and a new card. Reload once and open it.
Fill in the programme information
The right-hand Programme Information panel is edited inline: select the pencil beside a field, enter the value, then the tick to save (the cross cancels). Wait for Field updated before moving to the next field. The fields are code, NZQA level, duration in weeks, total credits, EFTS, programme type, qualification code and description.
Add an intake
- On the programme detail page, scroll to Intakes and select Add intake.
- Enter the intake name and its Start date and End date.
- Leave Status as Active unless the intake is deliberately closed, then select Create. Expect Intake created and the intake in the list.
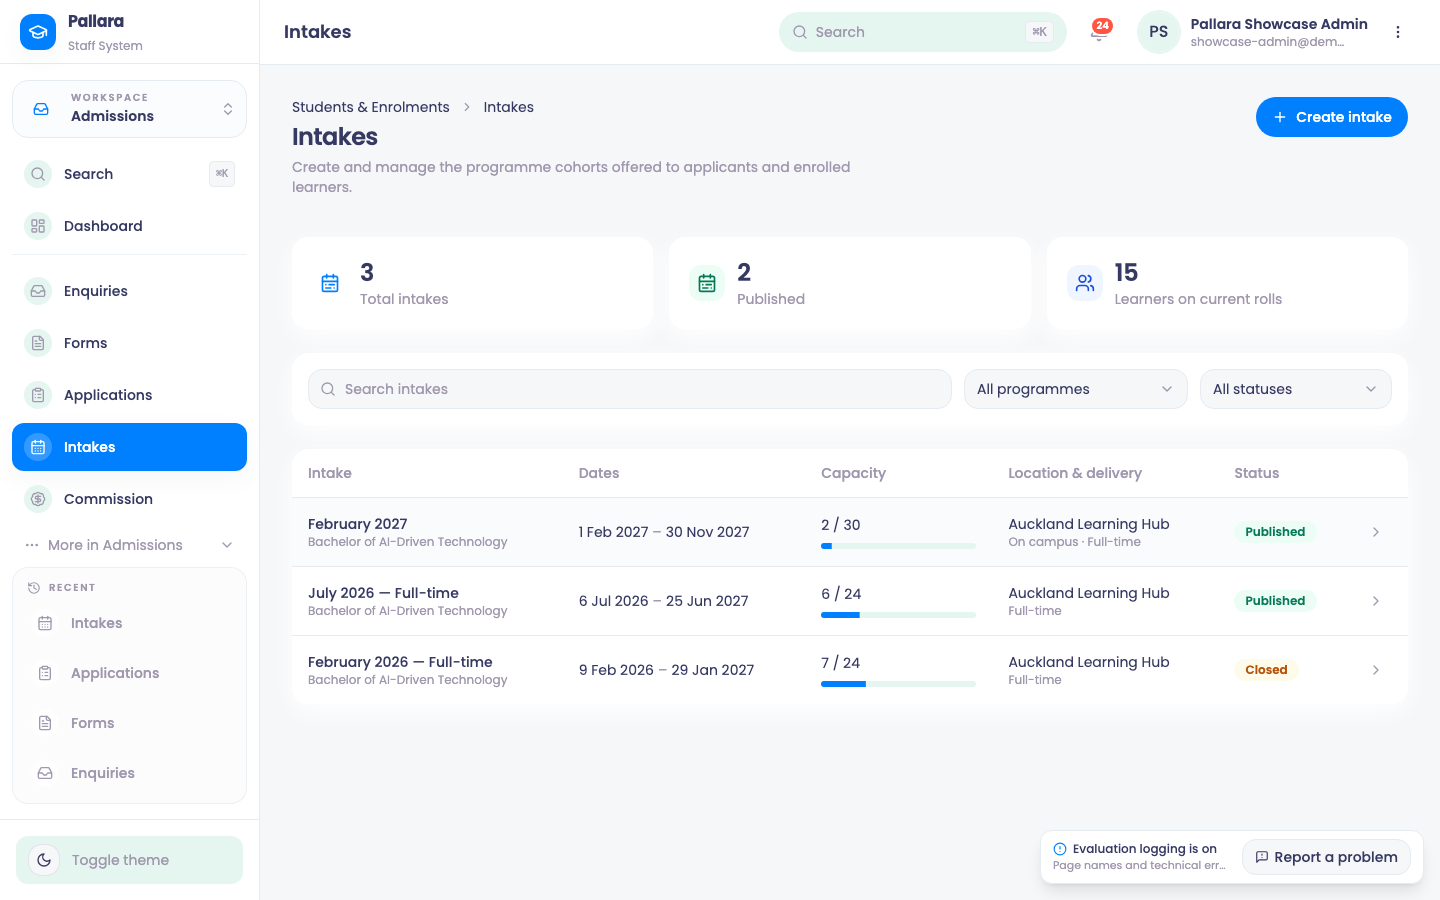
Intakes also have their own page — Admissions → Intakes — which lists every intake across programmes with its dates, capacity (learners on the roll against places), location and delivery mode, and status. Create intake there does the same job as the programme page, with capacity and location included.
Delete an empty draft
A programme in Draft status with nothing attached exposes Delete draft on its detail page. Published programmes, and drafts with intakes, enrolments, courses, finance, completion, AI, application, outcome or builder records, cannot be deleted from here; remove those records through their own workflows first.