Sign in and use the staff dashboard
Where to sign in, what the dashboard shows, and how to trust the numbers on it.
Walkthrough · 4 steps
Your first five minutes
Select a step to see the screen for it.
- 1Open your provider's staff address and sign in. Two-factor, if it is on, asks for the code next.
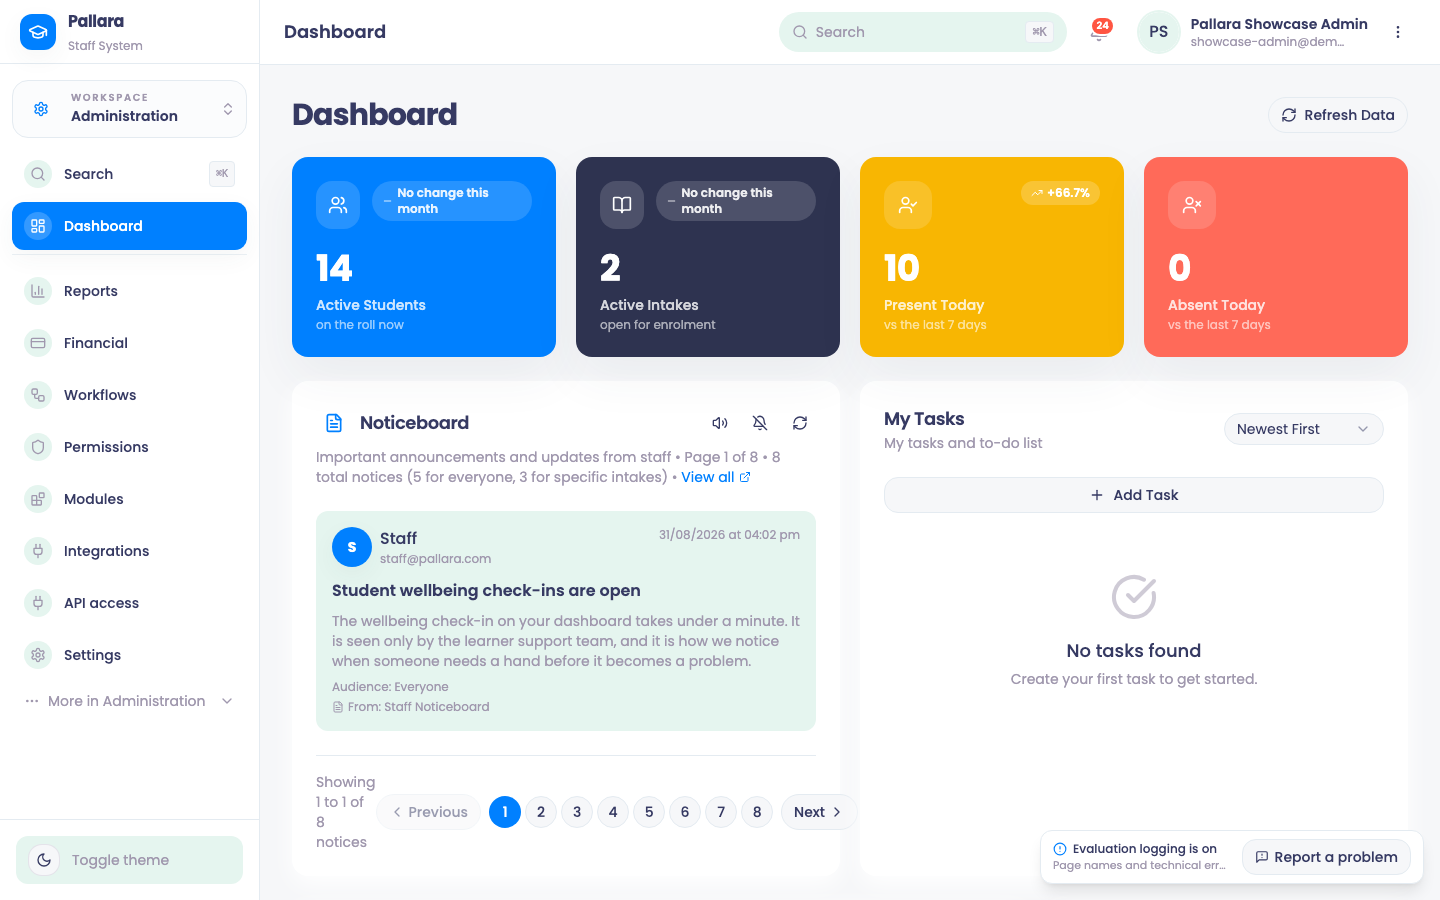
- 2The dashboard: four counts, the noticeboard and your tasks. Refresh Data before trusting a number.
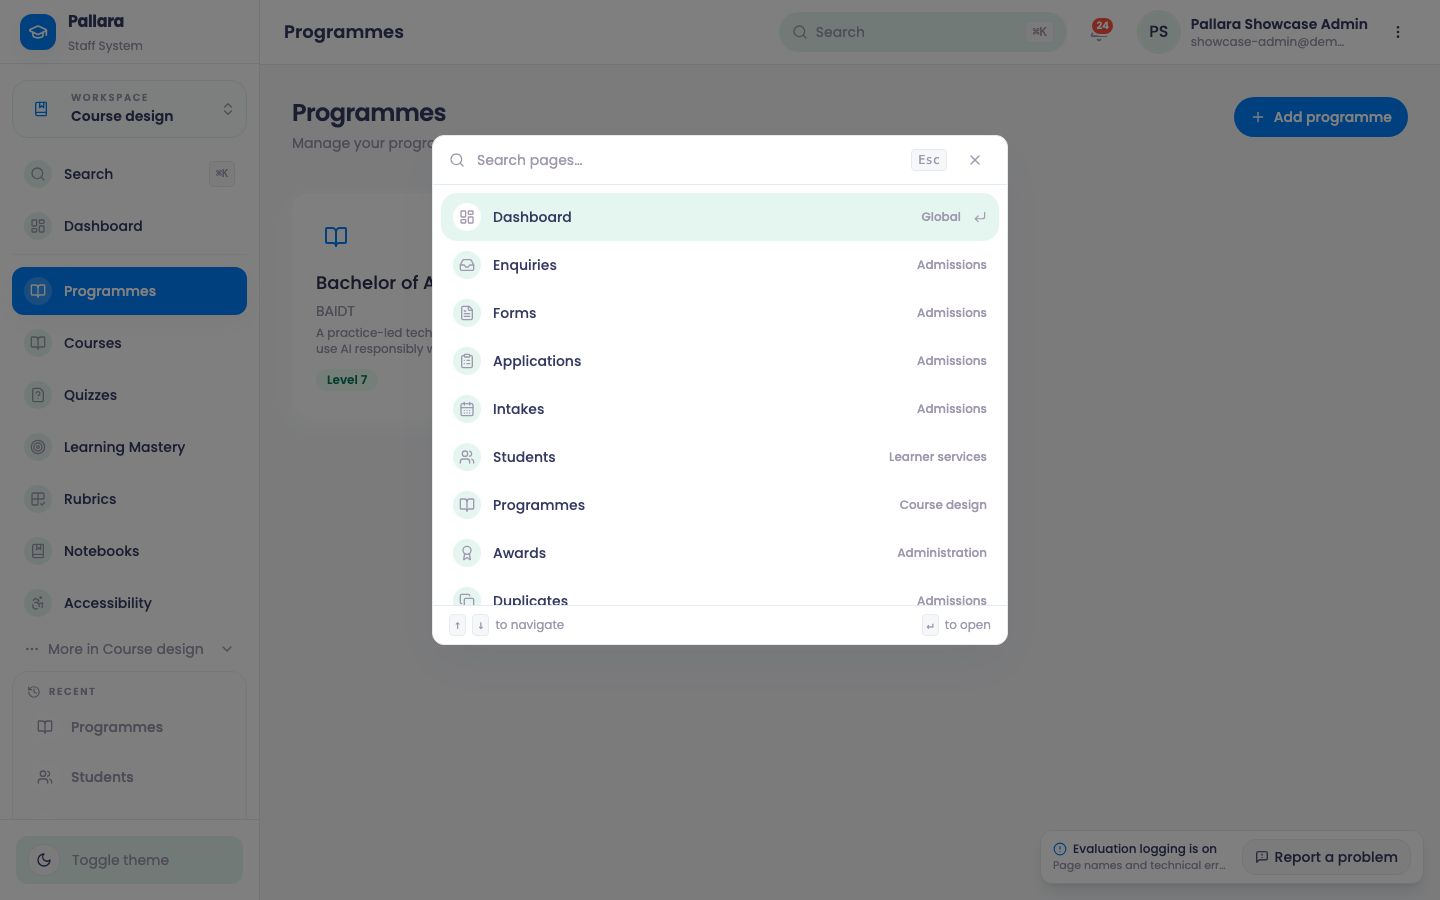
- 3Press ⌘K (Ctrl+K) and type a page name — every page is one keystroke away, labelled with its workspace.
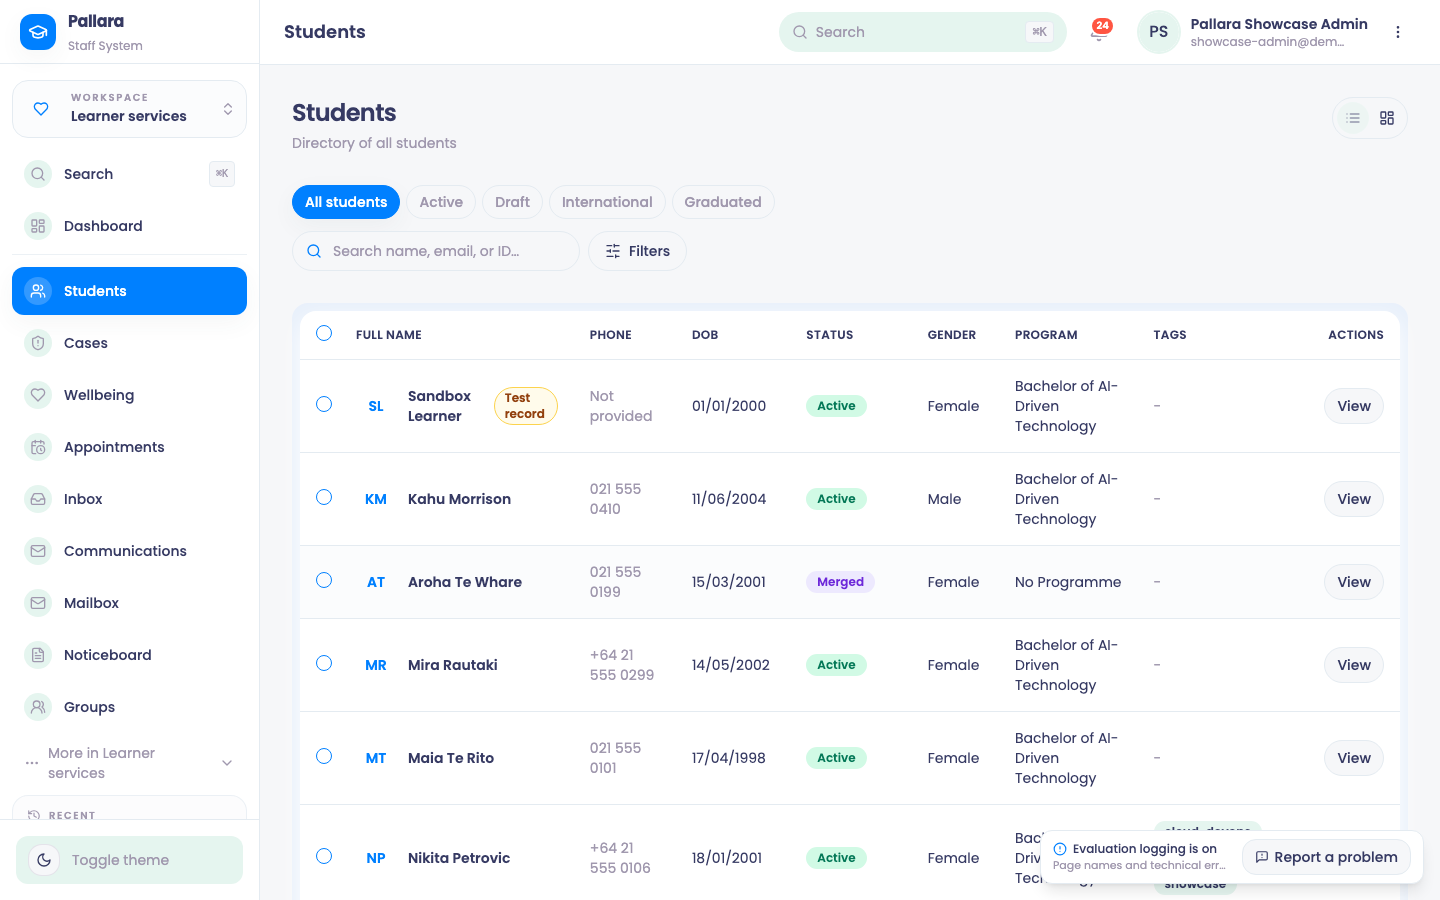
- 4Switch workspace from the top of the navigation. Each workspace shows its main pages; More in … holds the rest.
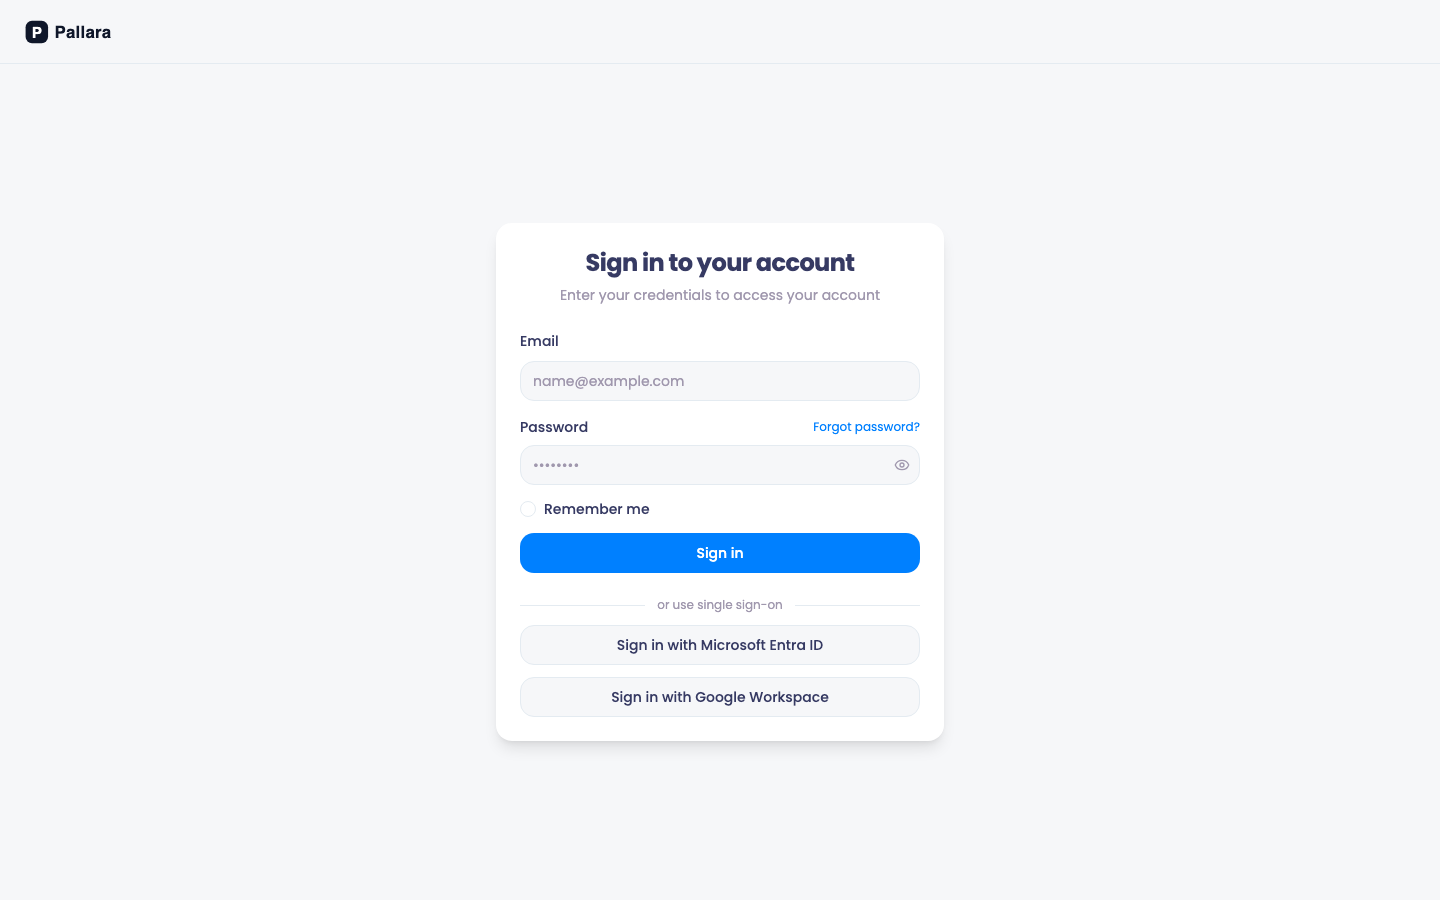
The staff sign-in page.
The dashboard in the Administration workspace.
Search: every page, by name.
The Learner services workspace with Students open.
1 / 4
Sign in
- Open your provider's staff portal. Every provider has its own address in the form
https://<provider>-staff.pallara.app; the learner portal ishttps://<provider>-students.pallara.app. - Enter your staff email address and password, then select Sign in. If your provider has turned on single sign-on you will see a Sign in with Microsoft or Google button instead.
- If two-factor authentication is enabled on your account, complete the authenticator check when asked before continuing. Use the current six-digit code; you may be asked again when verification expires or you change browser. See account security for setup and help.
- If someone else is already signed in on the machine, open the account menu at the top right and choose Sign out first.
Read the dashboard
The dashboard is a summary of the whole provider on one screen: active students, enrolments, intakes, today's attendance, enquiries by source, upcoming events and the noticeboard.
- Select Refresh Data before relying on any operational count. The cards update in place.
- Select Active Students — view list, or any attendance card, to open the underlying list.
- Use the Both, Domestic and International filters and the programme picker to narrow the enquiry and enrolment summaries. Cards and charts update without leaving the page.
- Under Noticeboard, page through notices or select View all for the full board.
- Review Upcoming Events and select View Calendar for the full record.
Manage your tasks from the dashboard
- Under My Tasks, select Add Task.
- Enter a title and optional description, choose a priority and, when useful, a category.
- Under Assign to, leave Only me (personal task) or choose a colleague. Students are never task assignees here.
- Add an optional due date and time, then select Create Task. The card shows title, creator, assignee, category and a due-date label.
- Tick the checkbox beside a task to complete it; tick it again to reopen it. Use the pencil (Edit task) to change it, and Edit task → Delete task to remove it permanently.
TipTasks created by a workflow (see Manage and run workflows) land in the same list, assigned to the person the workflow named.
NoteIf a navigation item you expect is missing, the cause is almost always your role, a permission, or a module that has not been enabled for your provider. An administrator fixes all three — see Manage staff roles and Enable or disable a module.
Was this guide helpful?